


I loved painting these trees on Facebook live! I know some of you have purchased these from me but if you haven’t you can purchase a Vintage Ceramic Christmas Tree with lights by clicking here.
Disclosure: Some of the links below are affiliate links, meaning, at no additional cost to you, I will make a commission if you click through and make a purchase.
The best part about these ceramic Christmas trees is that you don’t have stay inside the lines, you can be a whimsical painter like me! It is also so easy to personalize them and give them as gifts. You can paint a Halloween tree, use your favorite team’s colors or paint it to match your Christmas decor.
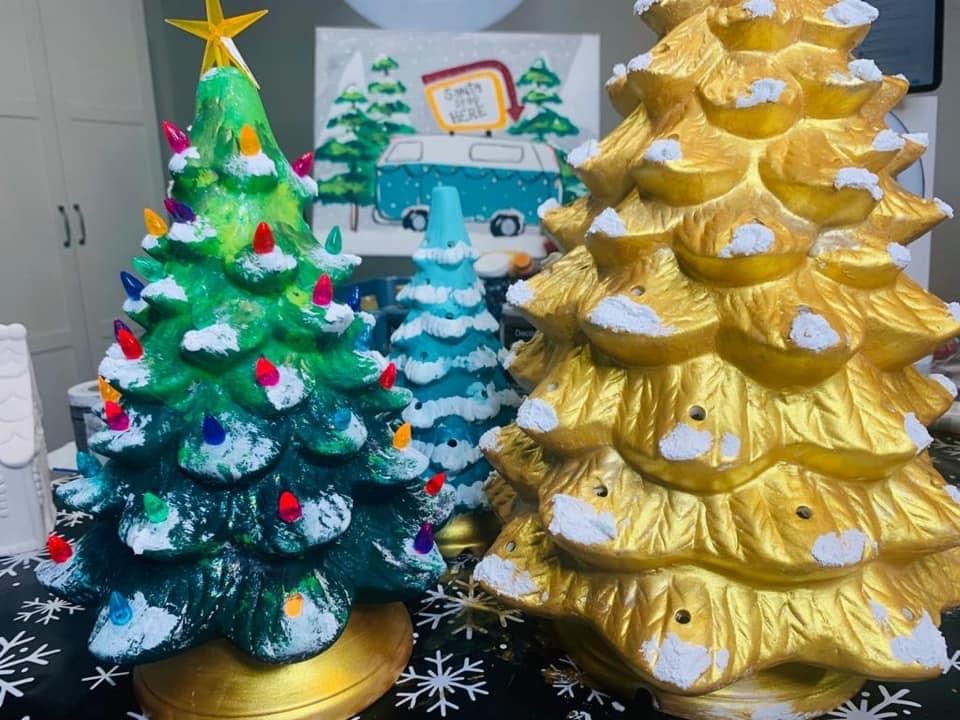
So, I’m going to be painting three different sizes, a small, medium and large ceramic Christmas tree. I will also show you a couple of different tips and tricks that makes painting these easy and fun. In addition to a kind of traditional green tree that I paint black first (I know, weird, right?) I’ll show you an ombre turquoise tree, and a solid white tree with gold tips.
Let’s start painting!
Before you start painting put on some of your favorite music, I love Chris Stapleton and Cody Johnson! Then get your favorite drink, whether that is a glass of wine or cup of coffee.
I’m starting with the traditional green Christmas tree. I’m using Black, Hauser Dark Green, Festive Green, Festive Green Metallic as well as Yellow Green. I know that sounds like a bunch of different greens but, there’s really no right or wrong way to do this.

First you will want to use a big brush, a two-inch chip brush is always a good choice. Dip it in water and black paint and get it all over the ceramic tree resulting in a great vintage vibe. Let the tree dry and then start with the darker green first at the bottom of the tree. You will want to paint right on top of the black. Bring the darker green up a little to give it an ombre effect. Continue going up the tree with the lighter and lighter greens until you use the yellow green at the top.
The next tree I am going to paint is the Turquoise one. This one is going to be so much fun y’all! I’m using Peacock Teal, Peacock Pearl and Metallic Teal. I am painting this one like I did the green tree only this time I’m starting at the top of the tree. with a little of the Peacock Teal and only go part way down the tree. Then blend the Peacock Pearl and go a little further down the tree. Lastly you are going to want to blend and finish the tree in the Metallic Teal.
I decided to paint the large tree all white with gold tips. You will need white and gold paint for this one. Paint your tree all over white first and let it dry. Then just brush the gold paint on the tips.
Let’s add some snow!
You can also add snow to these trees to give them that winter wonderland vibe. Once your tree dries you can add snow on the tips with white paint or Snow-Tex. Don’t forget to spray your tree with spray polyurethane before you add Snow-Tex. Did you know that you can also add snow to your winter paintings?
Learn how to add snow to your winter paintings.

Painting these ceramic Christmas trees is such a fun DIY Christmas craft to do by yourself or with family and friends. Comment below and show me your completed trees. I’d love to see what you came up with!
Don’t forget that these are even great for paint party ideas! You will need to decide what to charge so you are making a profit EVERY party. I love helping you grow your businesses using Facebook live, marketing, and social media hacks! Maybe I can answer some creative business questions for you too!
Supply List
- Get your Ceramic Christmas Tree here
- Spray Polyurethane
- Snow-Tex
- Craft Twinkles
- Black Acrylic Paint
- Dark Green Acrylic Paint
- Metallic Green Paint
- Green Acrylic Paint
- Yellow Green Acrylic Paint
- White Acrylic Paint
- Peacock Teal Acrylic Paint
- Peacock Pearl Metallic Acrylic Paint
- Metallic Teal Acrylic Paint
- 24 Karat Gold Acrylic Paint
- Champagne Gold Acrylic Paint

I’m gonna try this for the first time for my daughters gift to there families.wish me luck any suggestions.
Exciting! Check out this free training. It may help you. https://www.paintpartychallenge.com/challenge
-Heidi